Overview
Share links allow you to share a direct link to a file or folder, rather than sharing a permanent Team Share. Share links can be configured for users in your organization and outside of your organization. You can send a public share to recipients inside or outside of your organization; alternatively, you can send a secure share, which requires login credentials. If you send a secure share to a recipient outside of your organization, the system will create a guest account for that user.
More Ways to Collaborate
For information on how end users can collaborate in Team Shares, please reference the Creating Team Shares as an End User Knowledgebase article.
Instructions
Share links can be created within the web portal, from the desktop client, or from a mobile device.
Sharing a File or Folder Through the Web Portal
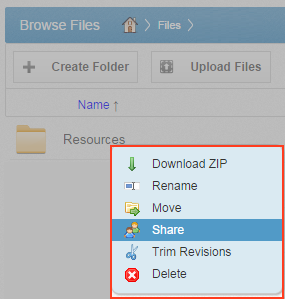
- Right-click the file or folder and select Share.
 A share link is automatically created. Additionally, the Share Access dialog box displays, allowing you to configure share settings.

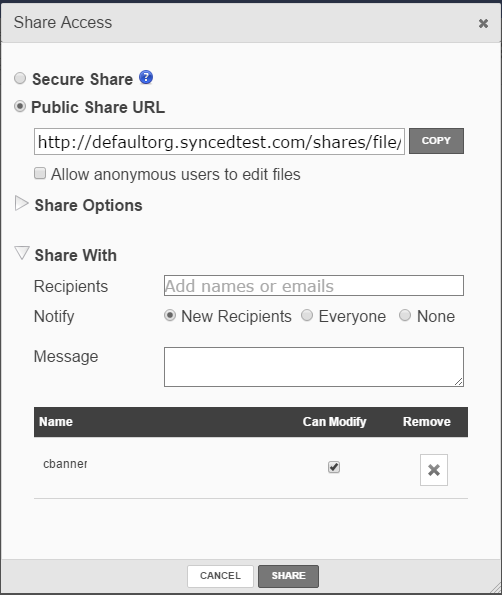
- In the Share Access dialog box, configure settings for sharing the link, including:
- The Secure Share option, which sends password-protected share links to items.
- The Public Share option, which sends standard share links to items. If you create a public share link, you can also select the Allow anonymous users to edit files checkbox to allow recipients to edit the file online using the Collaborative Web Editor.
- The Share Options settings, which allow you to select whether the share link will expire after a certain date, if each recipient should be limited to the number of times the item can be downloaded, and if you would like to be notified through email when the share is downloaded. If you are sharing an entire folder, you can also select to receive a notification when an item is uploaded to the shared folder.
- The Share With settings, which allow you to specify share recipients and set permissions for each of these users. This section is only required if you are sending a secure share link.
- The Permissions settings, which let you set Can Modify permissions, allowing the specified user to edit the file using the Collaborative Web Editor. If you are sharing an entire folder, Can Modify also allows users to upload files into the folder. Additionally, you will be able to set Can Delete permissions, allowing the user to delete files within the shared folder.
- Click the Share button save your changes. You will be redirected to a confirmation page.Note: Clicking the Cancel button will close the dialog box, but will not remove the share link.
- Optionally, click the Remove Share button to delete the share link if necessary.

 A share link is automatically created. Additionally, the Share Access dialog box displays, allowing you to configure share settings.

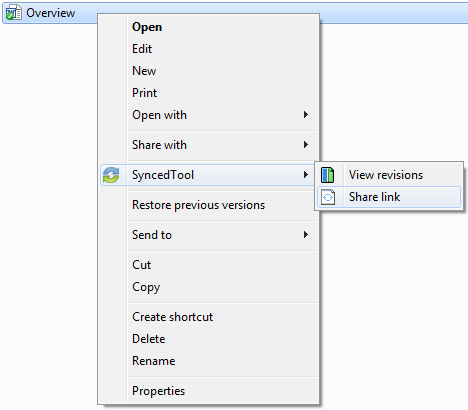
Sharing a File or Folder Through the Desktop Client
- Right-click on the file or folder, point to the SyncedTool menu, and select Share link.
 A share link is automatically created. Additionally, the Share Access dialog box displays, allowing you to configure settings the same way as you would from the web portal.

- In the Share Access dialog box, configure settings for sharing the link, including:
- The Secure Share option, which sends password-protected share links to items.
- The Public Share option, which sends standard share links to items. If you create a public share link, you can also select the Allow anonymous users to edit files checkbox to allow recipients to edit the file online using the Collaborative Web Editor.
- The Share Options settings, which allow you to select whether the share link will expire after a certain date, if each recipient should be limited to the number of times the item can be downloaded, and if you would like to be notified through email when the share is downloaded. If you are sharing an entire folder, you can also select to receive a notification when an item is uploaded to the shared folder.
- The Share With settings, which allow you to specify share recipients and set permissions for each of these users. This section is only required if you are sending a secure share link.
- The Permissions settings, which let you set Can Modify permissions, allowing the specified user to edit the file using the Collaborative Web Editor. If you are sharing an entire folder, Can Modify also allows users to upload files into the folder. Additionally, you will be able to set Can Delete permissions, allowing the user to delete files within the shared folder.
- Click the Share button to save your changes. You will be redirected to a confirmation page.Note: Clicking the Cancel button will close the dialog box, but will not remove the share link.
- Optionally, click the Remove Share button to delete the share link if necessary.
 A share link is automatically created. Additionally, the Share Access dialog box displays, allowing you to configure settings the same way as you would from the web portal.
Deleting or Revoking Share Links
Share links can be deleted by both administrators and the end user who generated the share link. When a share link is deleted, all users who had previously been given access to the shared content will no longer have the ability to navigate to the share link URL.
Alternatively, administrators and end users can revoke access to one or more users who were previously granted access, without deleting the entire share link URL.
End users can manage share link settings in the Shares tab of the web portal.
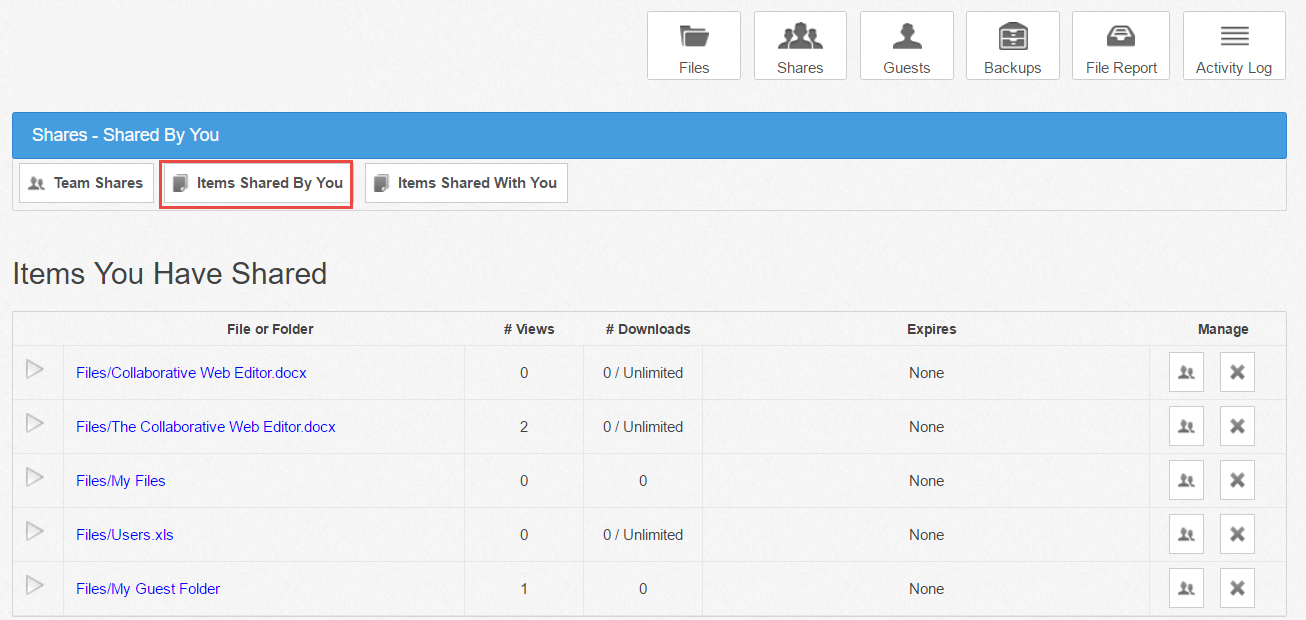
- In the web portal, click the Shares tab.
- Click the Items Shared By You button to track how many times an item you shared has been viewed, downloaded, and whether or not it is set to expire on a certain date.

- Click the Delete button to delete a share link URL.

- You can also click the share link arrow to expand an item, which allows you to view detailed information about the user that received your shared content. It also allows you to revoke access to one or more users individually, without deleting the entire share link URL.


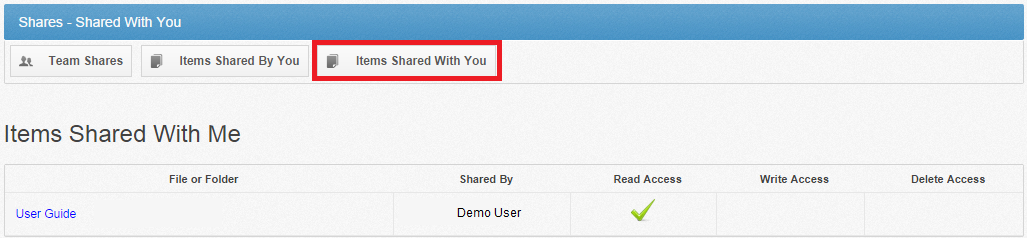
Viewing Items Shared With You
You can also view a list of all content that has been shared with you by other users.
- In the web portal, click the Shares tab.
- Click the Items Shared With You button to view files that were shared with you by others in your organization, as well as information about who shared the file and what access rights you were given (including read, write, and delete).