myfolders allows users to place locks on files and folders in Team Shares, giving subscribers the ability to set read-only permissions on shared content. This feature prevents other Team Share subscribers from editing and overwriting content while changes are being made. Users can place locks on a whole Team Share, a subfolder in a Team Share, or a file in a Team Share. When an item is locked, a lock icon is placed over the file or folder, alerting other Team Share subscribers that it is in read-only mode. Administrators have the ability to unlock any file or folder. Locks are enforced across desktop clients, the web interface, and mobile devices.
If a user forgets to lock a file or folder before making changes, a file sync conflict could occur. For more information, please reference the How Do I Manually Resolve a File Sync Conflict Knowledgebase article.
For information on how end users use this feature, please reference the How Do End Users Lock Files and Folders Knowledgebase article.
Benefits
The file locking feature is useful when an end user wants to prevent other user accounts from accessing items when changes are being made, preventing file sync conflicts from occurring. Additionally, this feature allows for the creation of read-only Team Shares, or read-only files and folders within Team Shares. For example, you can create a read-only Human Resources Team Share that houses employee forms and policies; end users can read and download files, but cannot edit or delete files.
Configuration Options
Administrators can configure the file locking feature in a number of ways, depending on the needs of the individual organization. For example:
- Administrators can decide to turn on or off the Auto Lock Word/Excel feature for individual Team Shares.When the Auto Lock Word/Excel feature is turned on for Team Shares, subscribers are automatically prompted to lock Microsoft Word and Excel files each time they are opened. If this feature is turned off, users must remember to manually lock and unlock files and folders using the desktop client’s right-click context menu.
- Administrators can configure the Use Filesystem Permissions policy to determine whether locks are hard or soft.When hard locks are configured, the desktop client changes the NTFS permissions on Windows, or HFS Plus permissions on Mac, in order to prevent changes by other users. These permissions allow for a much stronger lock, and are especially important for File Server Enablement environments where mapped drive users must be notified by the filesystem when a file is in use.A soft lock does not utilize NTFS permissions or HFS Plus permissions, and instead allows a user to make changes to his or her local copy.
Best Practices
In most instances, we recommend that administrators enable hard locks and turn on the Auto Lock Word/Excel feature for Team Shares. This configuration ensures the best possible user experience, and helps prevent file sync conflicts.
Locking and File Server Enablement
If a Team Share has been mapped to a file server through File Server Enablement, locks will be honored both in the Team Share and on the file server. If NTFS permissions are modified on the file server, however, these modifications will not be honored in the Team Share.
Additionally, when you specify a network path as a source for File Server Enablement, the content on the network path will not support the Auto Lock Word/Excel feature.
Auto Lock Expected Behavior
- This feature applies to .doc, .docx, and .xlsx files. This feature also applies to .xls, .odt and .ods documents if the documents are opened with LibreOffice or OpenOffice.
- This feature is not supported for Word for Mac and .xls files opened with Excel.
- This feature is only accessible from the desktop client installed on local machines.
How to Turn File Locking On and Off
By default, the File Locking policy is turned off. In most cases, however, it is a recommended best practice to allow end users to lock and unlock files and folders within Team Shares. This feature is useful when an end user wants to prevent other user or guest accounts from accessing items when changes are being made, preventing sync file sync conflicts from occurring. This setting can be changed in the Policies tab of the administrative web portal.
To turn file locking on or off:
-
- In the Organization navigation menu, select the organization in which you want to manage file locking. The selected organization displays.
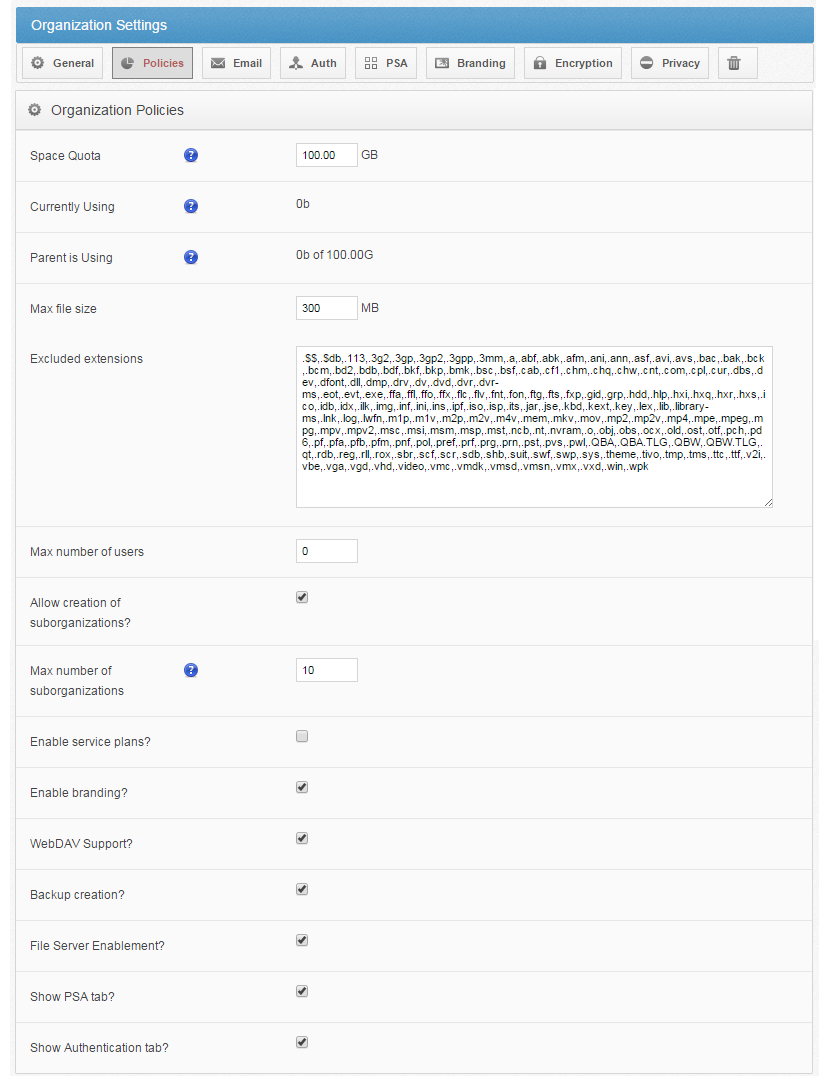
- Click the Policies tab. The Organization Policies section displays, showing organization policies that were configured when the organization was created.

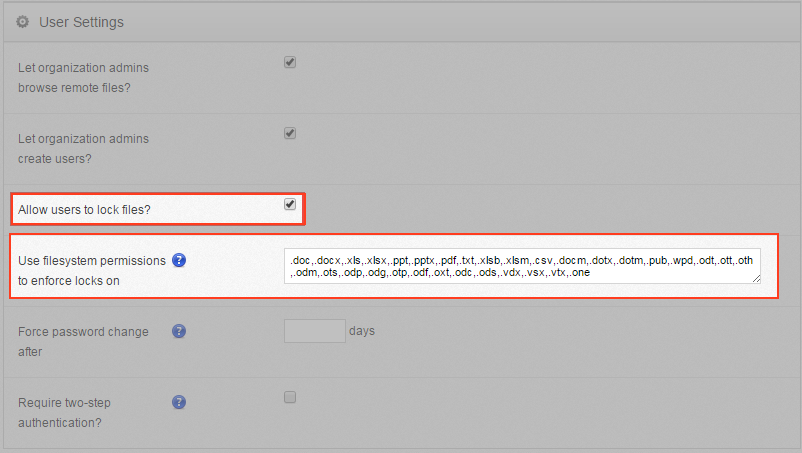
- In the User Settings section of the page, you will see user settings that were configured when the organization was created. Optionally, check the Allow Users to Lock Files checkbox to allow end users to lock and unlock files and folders.

End users will now have the ability to lock and unlock files and folders. - Optionally, review the extensions listed in the Use Filesystem Permissions to Enforce Locks On field. This field allows you to specify extensions on which you would like the desktop client to enforce locks through filesystem permissions (also called hard locks).When a lock is placed, the desktop client will change the NTFS permissions on Windows, or HFS Plus permissions on Mac, in order to prevent changes by other users.On Windows, hard locks are implemented by setting the following DENY ACE for the EVERYONE SID:
- Create files/write data,
- Create folders/append data,
- Write attributes,
- Write extended attributes, and
- Delete.
On OSX, the UF_IMMUTABLE flag is set (essentially a user lock).
These permissions make for a much stronger lock.
How to Enable Auto-Locking for Files in a Team Share
In addition to allowing end users to lock and unlock files within Team Shares, you can set up Team Shares so that certain files automatically lock when they are opened for editing. This feature is a best practice, as it prevents file sync conflicts from occurring, especially in shared folders with many subscribers. When files are closed, they automatically unlock.
Note: Please see the Expected Behavior section listed above for supported file types.
To enable auto-locking for Word and Excel files in a Team Share:
- In the Organization navigation menu, select the organization in which you want to manage auto-locking. The selected organization displays.
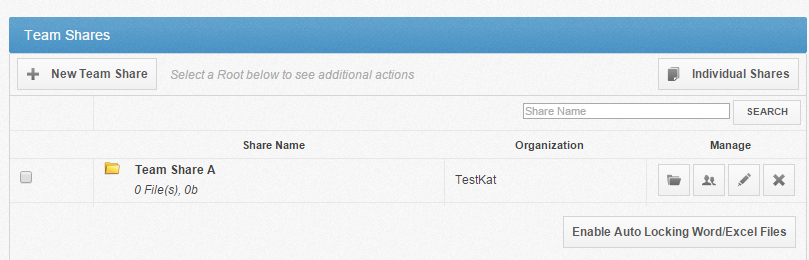
- Click the Shares tab. The Team Shares page displays, listing existing Team Shares.

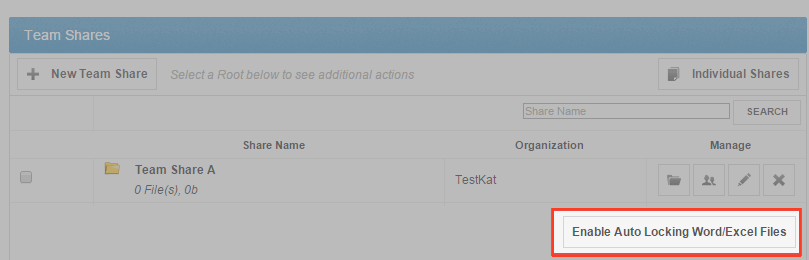
- Click the Enable Auto Locking Word/Excel Files button to enable auto-locking for the selected Team Share.

A pop-up window displays in your browser, prompting you to confirm your selection. Auto-locking is now enabled for the selected Team Share.